Class Christmas Party- with an OT Flair!

Tis the season for school holiday parties! As a room mom this year, I have had so much fun coming up with the activities for the class party! I always put an OT spin on it out of habit. For Halloween we had a sensory slimy spaghetti noodle feel and find with blindfolds! The kids LOVED it! The other parents cringed so naturally, I was manning that station! This month, for our class Christmas party we have come up with some more fun activities! Here is what we will be doing…

We will have a station of Minute-to-Win-It games!

We will have a station of Minute-to-Win-It games!

IMG_5362.jpg
IMG_5364.jpg
This activity is fantastic for visual tracking!

This activity is fantastic for visual tracking!

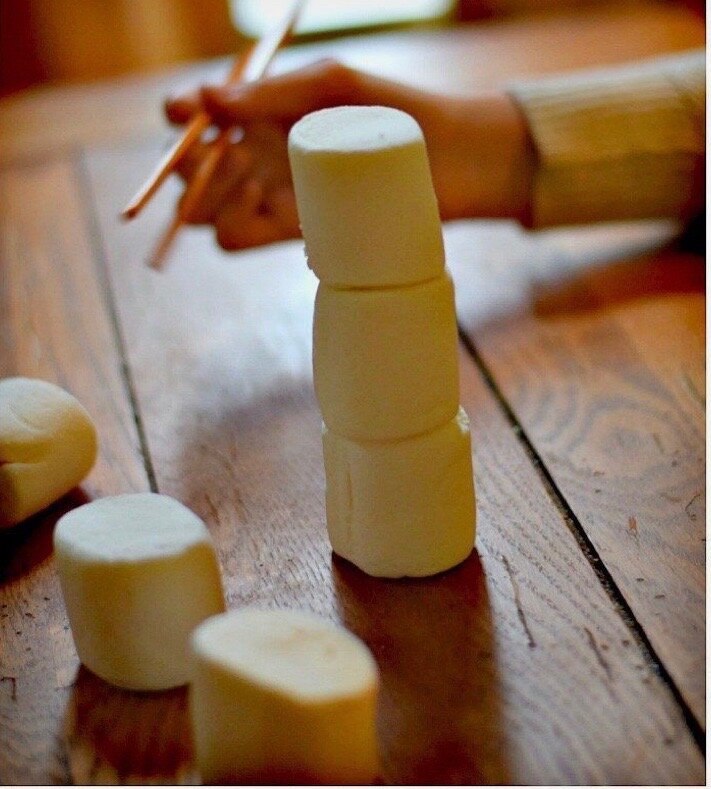
Stacking marshmallows with tongs! Of course there is fine motor involved!

Stacking marshmallows with tongs! Of course there is fine motor involved!

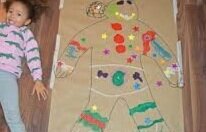
gingerbread+man.jpg
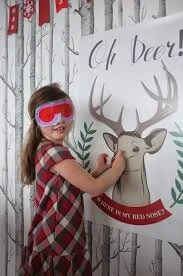
Pin the Nose on Rudolph- I love giving kids the opportunity to spin and get some vestibular input- it’s one sensation that kids do not get enough of now that most schools do not have swings! It can be arousing so monitor how the kids spin and spin i…

Pin the Nose on Rudolph- I love giving kids the opportunity to spin and get some vestibular input- it’s one sensation that kids do not get enough of now that most schools do not have swings! It can be arousing so monitor how the kids spin and spin in both directions! This will be one to follow with Bingo for some calming input.

bingo.jpeg
tree ornament.jpeg
twig star.jpeg
angel ornaments.jpeg

We will have a station for the kids to make their own ornaments- for our class, we will do the angel ornaments to tie into the local Christmas parade the class was in, dressed as angels!

I love the twig ornaments for fine motor tying practice and using natural elements!

Reindeer food trail mix for a little snack break during the class party!

Reindeer food trail mix for a little snack break during the class party!

It surely will be loads of fun and a great way to celebrate the season! Are you participating in any kids holiday parties? What fun activities do you do?!

Holiday Snow Globes!

This week in my MakerSpace class, we made mason jar snow globes! The kids were SO excited to make them and they turned out so so cute! Here is an easy tutorial on how you can make these at home. They would be so fun for a class party activity, a sweet gift to make for loved ones, or a festive rainy day activity.

IMG_5616.jpg

Here are the materials you need….

I love when an activity has just a few materials that are needed and a few easy steps. The hardest part is waiting for the figurines to set- the kids wanted to see their snow globe ASAP… but learning patience is all part of it, huh?

So here is what you will do…

  1. We did use mason jars- which works but I’ve linked some better jars that I came across. I also don’t love the quilted jelly jars I ended up with… If you use a mason jar that you have at home- be sure to seal the lid shut first (the round top to the metal ring of the mason jar lid) and let dry.

  2. Using a drop of the waterproof glue, glue your figurines to the lid. Let them dry completely.

  3. Fill your jar with water, leaving about a 1/2” of space.

  4. Add a few drops of glycerin. This helps slow the settling of the “snow.”

  5. Sprinkle in your glitter snow.

  6. Once the figurines are dry, place some waterproof glue on the rim of the jar and seal it shut!

    Voila! You have a snow globe! It is such a fun activity to do with your children and see the delight in their eyes with the decoration they made!!!

Learn how I decided to start Messy Tot Group!

I am excited to share a feature of Messy Tot Group over at The Artful Parent, a blog and business that I admire and inspires me weekly! Be sure to check it out…

IMG_9010.jpg

I wrote down some of my responses to their questions when I saw their inquiry about sharing how I got started with OT OuTside and Messy Tot Group. I’m so excited to share this feature with some other amazing women who have started their own businesses creating art with children…

Be sure to check out all that The Artful Parent has to offer too… SO many great tips, projects, and ways to connect with your kiddos!

Favorite Halloween Activities

I love fall! The way the light filters through the color-changing leaves, the chill in the air, the smell of warm spices, fires in the fireplace, and the festivities that begin and roll right into the holidays! Fall also gives me lots of ideas for activities with my own children and clients!

Here are a few to get you inspired this month…

public.jpeg

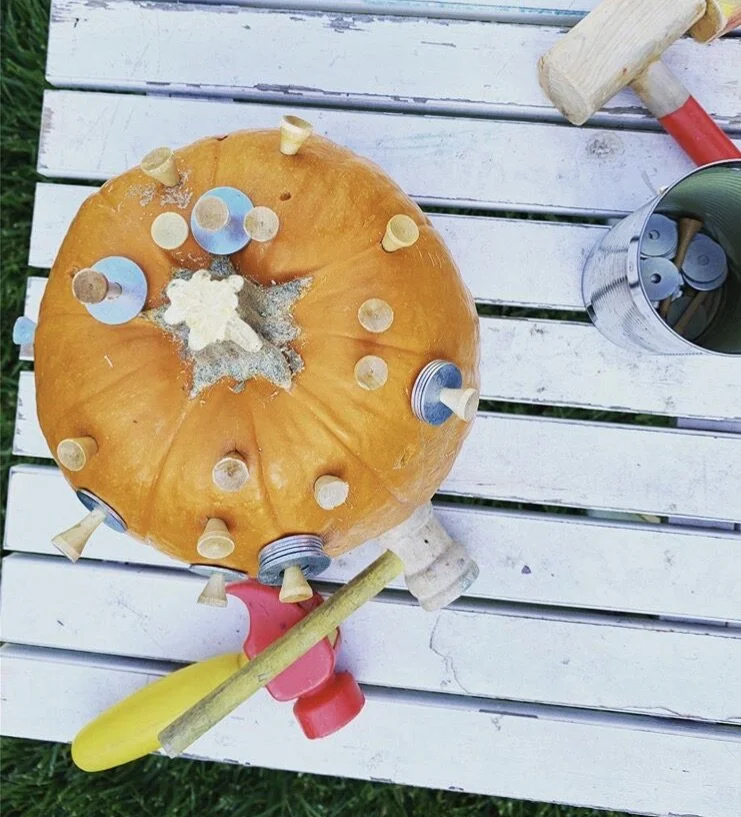
What better activity then using what nature gives us: pumpkins! This is a go-to activity because it does so much for the child- builds proprioceptive awareness, grip strength, motor planning, using two hands together, and visual tracking! Plus, they get SO excited to use a hammer and bang a golf tee into the pumpkin!

IMG_8595.jpg

I love a good slime recipe and October is the perfect time to make same ooey gooey slime. Try adding in some fake eyeballs, snakes, and spiders!

Here is what you need:

3-4 heaping cups of shaving cream

1/2 cup school glue

1 tsp baking soda

1 Tablespoon contact solution

food coloring

The baking soda and contact solution are what give it the slime texture so allow these two ingredients to interact by adding one then the other and mix together! Drop in your food coloring and stir! You will have some wonderful fluffy slime! It really doesn’t make a mess but be sure to play with it away from carpet. Store in an airtight container!

public.jpeg
public.jpeg

Pumpkin ring toss is so easy to set up and great for building hand-eye coordination! You just need a pumpkin or two with a stem and some glow-in-the-dark rings! Such a fun way to incorporate math too- you can have the kids tally their score!

If you want to try out a sensory bin, black beans and orange lentils are the perfect material! You could even follow it up with a meal using either black beans or lentils and involve your child in the cooking process! For the sensory bin, I love adding spider rings and vampire fangs to use as tongs all while strengthening the hands! You can add in mini cauldrons for scooping and pouring, witches fingers, eyeballs, and Halloween erasers! The kids can sort, count, compare, add and take away… it is a great activity to use with math in mind! It also helps build language and even pretend play.

public.jpeg

My favorite fall play dough uses pumpkin pie spice for a beautiful warm scent! Play dough is a great way to build hand strength. I encourage kids to cut play dough, roll shapes and letters, write in play dough for increased kinesthetic feedback, push and squeeze play dough for a calming sensory experience.
To make the play dough:

2 cups flour

1 cup salt

2 teaspoons cream of tartar

1 tablespoon pumpkin pie spice

2 tablespoons vegetable oil

2 cups of water

a few drops of food coloring (I add into the water first)

essential oil if you’d like!

Mix in a pot over medium heat until it comes together in a ball.

Transfer to a cutting board and knead. Play!

public.jpeg
pumpkin writing.jpg

I love this idea from The Nurture Store website out of the UK. You can use a permanent marker and write on it as an interactive game. Sit in a circle and roll the pumpkin to another person and they can write a math fact, sight word, use it as a way to practice social skills about what to do when you go Trick-or-Treating. So many ways that you can make this activity work for you and make learning fun!

We also love Halloween books to go with these activities! Here are a few we are currently loving:

Room on the Broom
By Julia Donaldson
Georgie
By Robert Bright
Pumpkin Light
By David Ray

Even with the fun of Halloween, it can be a hard day or even month for many children. The decorations can be scary, the costumes are very disconcerting when you cannot recognize someone’s face, and let’s not forget the sugar highs and lows… Helping your child process the holiday can be challenging. Here is a great website for social stories that can help children with anxiety or autism as they get through the month. Social stories are simple books that can help children prepare for an unknown or unexpected event. I use them in practice and even with my own children to help them process different situations. The Berenstain Bears books are great ways to help children with upcoming events as well!

As with any book, be sure to preview it before reading it to your child, especially if they are experiencing very high anxiety or fear.

So tell me, what are your favorite Halloween activities and books?!

Some Tips for the Sensory Avoider

Too loud, too busy, too bright, too itchy, too scratchy, too hot, too cold, too fast, too sticky, too wet, too mushy, too spicy, too crooked, too twisty, too high, too windy, too slippery, too chunky….

Do these apply to your child? Do you often hear these “toos” even when you would think, “really?!” You may not notice the brightness of the light, the wind blowing, the food doesn’t seem hot at all yet your child says too hot… The sensory avoider notices these sensory aspects that might go unnoticed to most. They are hyper-responsive to sensory input which means that their sensory system registers this input more than others would. It can be so hard to anticipate this child’s needs because when all would seem right in the world, they notice. The sensory avoider may have big reactions or shut down. They may stand on the outskirts of situations to try and mitigate some of this sensory input. Far too often, the world we live in is so sensory-rich that the sensory avoider feels overwhelmed. What we can do as OTs, teachers, or parents is help teach coping strategies because so many of these things are out of our domain of control.

One of the interesting things about the sensory avoider is that it does not mean they dislike noise or watching fast-paced cartoons or video games. This child may use these as tools to drown out the world around them. They can dive into something that they feel they CAN control! The sensory avoider may even like fast roller coasters or spinning. The key is that they choose it on their terms and feel some sense of control over the sensory input.

I will give you some strategies to try at home and in the classroom but the key with the sensory avoider is figuring out what works for your child. What may work for one may not work for another. My hope is that having this knowledge and some tools in your toolbox will help you to understand your child, or a child in the classroom, just a bit more and can help them cope.

For the clothing sensitive child:

  • Offer 2 choices when getting dressed- the short sleeved or long sleeved shirt, pants or shorts/dress, short socks or long socks, these undies or those…

  • Try some sensory input before getting dressed- big squeezes from a parent, teach them how to put lotion on to see if that calms and “prepares” the sensory system, *if they have extreme responses, contact an OT and inquire about the Wilbarger Brushing Protocol*

For the sound sensitive child:

  • Talk to your child before going to a potentially loud or busy place- obviously you can’t control loud sounds in the environment, but you can cognitively help them process it by talking about the environment and sounds beforehand and after. If you are going to an airport, for example, talk about some of the sounds they might hear. Reading books about the experience or making a social story, such as going to the airport, also helps children prepare for new environments.

  • Talk to your child about strategies if they are in a loud environment such as a school assembly. Talk them through what they can do if they start to feel overwhelmed in the environment- this works for sounds, lights, even crowds. Give them strategies such as asking their teacher if they can go to the bathroom (including your teacher in this conversation beforehand, of course), step outside for a drink of water, if they have anxiety about the experience consider allowing them to stay for part of it then leave to help in the front office with a “very important job” so that they do not feel like they are missing out.

  • Again, the sound sensitive child might enjoy loud music at home but they are comfortable and familiar in this environment, they are potentially controlling this volume, or they are able to drown out extraneous sensory input with the music.

For the child that does not want their hair brushed:

  • Some children are very sensitive to self-care activities. I have had the most success when I can teach the child how to do these things by themselves. This includes trimming their nails! For the very young child who is sensitive, it takes some trial and error but experimenting with different types of brushes and detanglers (even if their hair does not feel “tangled”), try wetting their hair, be sure to use conditioner when washing to help make the hair smooth and knot free.

  • Cut nails after the bath or shower when they are soft. Consider filing nails rather than clipping. Try to use adult nail clippers rather than children’s if you feel you are able to do it with fewer “clips.” It truly is all about experimenting with what works and involving your child in the process.

For the tactile-sensitive child:

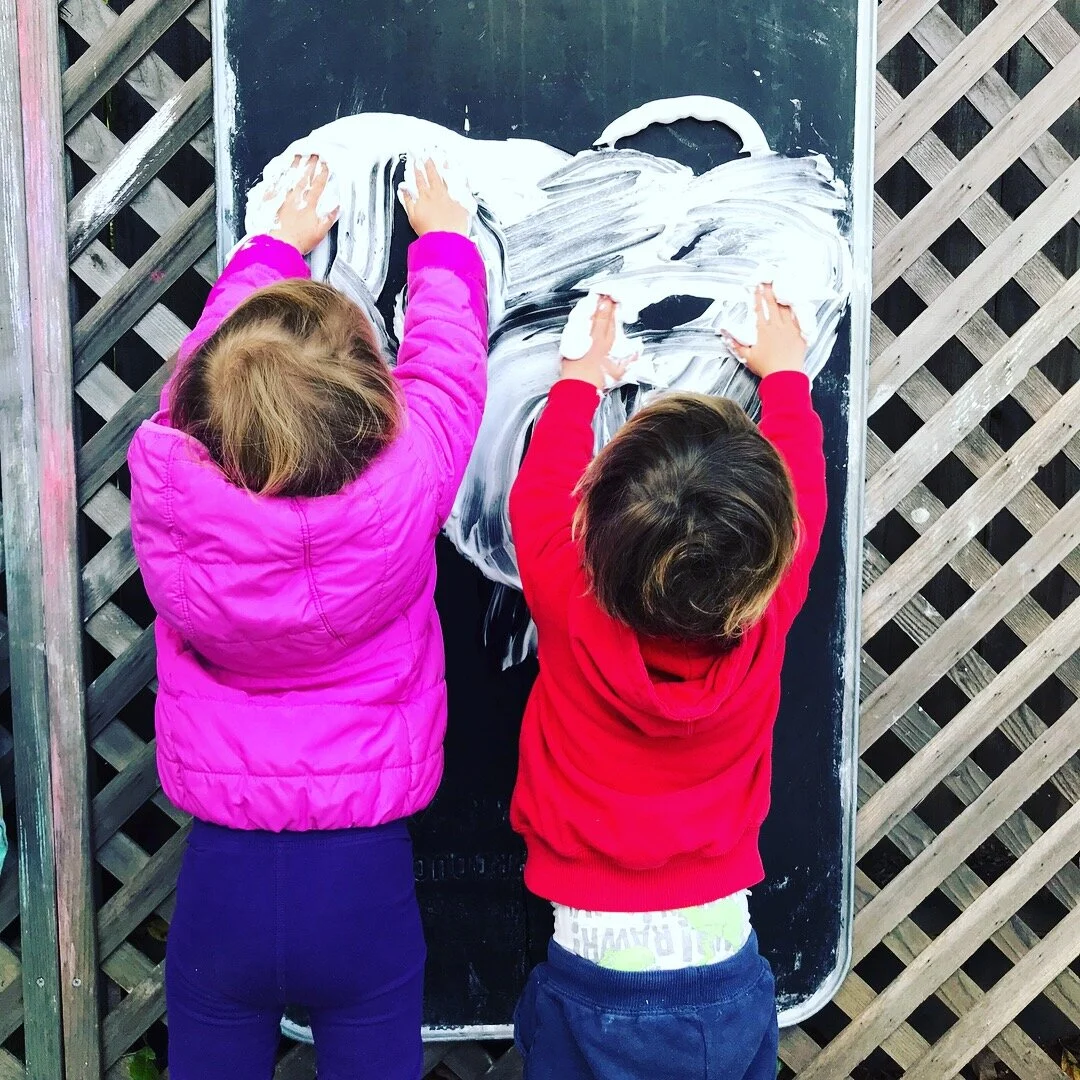
  • When children (and adults) do not like to touch certain textures or “get messy,” offer tools so that they can still experience the activity. Tongs, paintbrushes, clothespins with a pom pom or cotton ball to paint with, tongue depressors to spread… these items help the child to participate but they feel that they have some control over the experience. Over time, they may in fact begin to touch the texture! This also works with food-particularly if the child does not like getting messy but the food is a “finger food.” They may not eat it simply because they do not want to touch it.

  • Have the option to wash hands available, either with a wipe or soap and water. You can also talk to the child beforehand about the option being available but encourage them to wash after they have finished the activity. Some children will want to wash immediately when they get something on their fingers but over time, try to increase the time that they have the texture on them.

IMG_3040.jpg

For the child who dislikes crowds:

  • Being in a crowd can be extremely overwhelming for the sensory sensitive child. They may even avoid sports because the crowd around the ball is just too much. This is okay! Sports, especially contact sports is not for everyone. What you can do though to help their sensory system is “prep” the body beforehand. Provide some sensory input that helps the child with body awareness, visual tracking, and gives some deep input to their muscles and joints to wake up the proprioceptive system- this system can help calm the body.

  • Some warm-ups to try are wall push-ups, yoga tree pose and warrior 3, play a simple game of bounce and catch with a partner beforehand to wake up the visual system with visual tracking and some rhythm with the bounce-catch pattern, crossing midline activities such as elbow to opposite knee. These activities will help the child get their sensory system “ready” for the activity.

  • Talk to your child about strategies for PE if they feel overwhelmed by the crowd or the motor tasks. This can be an incredibly hard situation for children who feel that they are required to do what the PE teacher asks of them but their sensory system is over loaded. Include the PE teacher in this and talk about water breaks, giving the child a job such as passing out the equipment (some heavy work for the muscles is involved- this helps calm the system!), give the sensory sensitive child a position on the field or court that they are comfortable with- maybe goalie, maybe somewhere along the side. Most importantly, help the PE teacher understand the child’s sensory system and not that they are being “lazy” or defiant. Being in a state of fight or flight may look like that but in reality, the sensory system is so overwhelmed and the child may not be able to articulate why the sport is challenging to them or why they stay on the periphery.

soccer.jpeg

There are so many situations in which the sensory sensitive child feels overloaded. I could go on and on… Most importantly, talk to an OT if your child is not able to socialize with peers, participate in activities, cannot advocate for themself in the classroom to ask a question, or experiences anxiety about situations that have increased sensory input. I encourage you to try to look at the root cause with a professional and develop strategies so that your child can participate and enjoy the occupations of childhood!

Please reach out to me if you have additional questions!

Some Tips for the Sensory Seeker

Last week I wrote about some ways that you can observe whether your child is a sensory seeker or a sensory avoider. Now, I’ll provide some activities and tips you can try at home and school for the sensory seeker. While the child who seeks sensory input might constantly be seeking movement to gather sensory information from the environment, it is also important to teach this child strategies to calm. There are some environments in which moving just isn’t an option. Let’s start there…

How to help the sensory seeker find calm…

  • teach deep breathing- a balloon is helpful for a visual- describe how the tummy fills up with air and then we let it out of our nose or mouth. Teaching the child to count their breath, trace an 8 on their hand (for the school-age child who can make an 8), blow a feather off of their hand, use essential oils to encourage taking deep inhalations (this may take trying out different scents with your child to find out which they like and which they don’t)

  • create a mindfulness jar- you can read more about it in my previous blog post about self-regulation

  • try a weighted lap pad (you can DIY it- fill a stuffed animal with rice or beans by taking some of the stuffing out and replacing it then stitching it up really well) when the child needs to sit on the rug at school or in the car. If you are trying this, or any strategy, it may take a couple of times, even a hand-full of times to introduce it, for the child to understand that it is a tool, not a toy, not something to throw in the classroom…

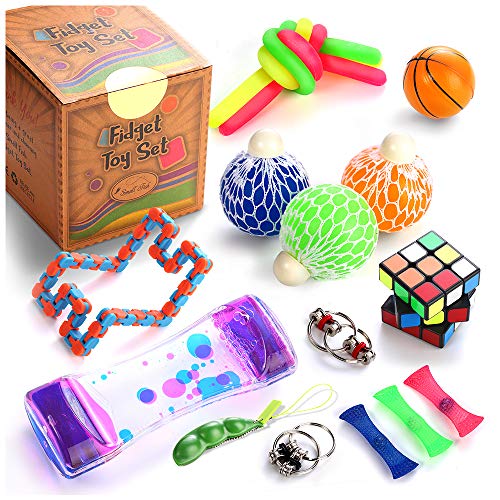
  • try a fidget toy for the class at circle time. Again, many teachers might say, “this will be distracting.” The first time, yes it will be. That can be the entire lesson on the carpet- how to sit with a fidget toy. But then each day, it will be less and less of a distracting element and a valuable tool to help the sensory seeker sit without bothering their neighbor, picking at the carpet, pulling on their shoelace. When used as a whole-class approach, the children who need it the most will not feel singled out

My favorite fidget tool is even a smooth rock or those glass vase fillers that the children can rub with their fingers- they are so calming!

Activities for the Sensory Seeker at Home…

Before heading off to school, help your child get ready for their school day with a list to help organize the morning and keep them guided. This can be in the form of “job cards” that they move from one envelope to the next once they’ve done their job with bonus points for “beating the timer” once they have finished the task, run to move their card and run to the next task! Part of their morning “job” should be getting some movement like jumping on the trampoline either for a few minutes- have them do sight words or math problems while jumping and you have just done some brain work and homework! Check! You can also have them jump for shorter increments in between their “jobs.” Figure out what works for your morning routine.

You can also have your child do animal walks to get from one room in the house to another- crab walk, bear walk, walk like a penguin, hop like a bunny. For everyone to get moving, try wheel barrow walks… mom or dad get their workout in too!

When your kiddo comes home from school, it might be very challenging for the sensory seeker to sit down and do their homework right away. Have a crunchy snack to provide some oral sensory input then get moving. Go outside and swing, play a quick game of tag, get on the trampoline again.. then try the list again for the evening routine!

Activities for the Sensory Seeker at School….

My favorite activities for the sensory seeker at school are heavy work jobs. This means that they may carry the basket of lunch boxes with a partner (if the school has the kids place them in a central basket), help the teacher pass out papers, carry books to their peers in the classroom, think anything that might give their body more pressure and provide some of that calming sensory input. Wearing their backpack to school and when you pick them up (rather than mom or dad carrying it) can be a great way to get some of that pressure in as they transition to or from school.

Movement activities also help the sensory seeker. Many schools use a program called Go Noodle to get kids moving. Having the class do desk push-ups as a quick movement break, reach up and touch their toes a few times… these quick movement breaks can re-center the sensory seeker. The child may seem more aroused after moving but this is the perfect time then to introduce those calming strategies- deep breathing, mindfulness jars, some yoga stretches.

These are my favorite yoga cards for kids- just a few of these cards can be a great way to calm kiddos or give them the extra movement they need on a rainy day lunch or recess.

Teaching the sensory seeker to ask for a water break when they need to move or a bathroom break can help educate them about their sensory system and sensory needs. Some teachers may complain that this child is always up out of their seat, sharpening their pencil, getting water, asking to go to the bathroom. This tells you a lot about their sensory needs so developing a method for them to meet these needs without disrupting the class is key. It could be moving their desk to the back of the classroom so that they can stand at their desk. We offer these options for adults, so why not kids?! Have clipboards as an option- movement does not always mean that the child is not listening, rather they need to move to listen!

Educating teachers about these strategies can help the sensory seekers in their classroom be more attentive and participatory rather than disruptive.

Here are some of my go-to books for sensory activities and information…

So tell me, what strategies do you find helpful at home and in the classroom for your child?

Sensory Seeker or Sensory Avoider?

When it comes to sensory processing, we all have different preferences for sensory input. There may be times when we seek out sensory input- I write this as I sip my morning coffee. I crave that warm cup of caffeine for my morning ritual or put another way, for my sensory input to help wake up. We may also avoid sensory input. I can no longer tolerate spinning- a very normal thing that happens as we age.

For children, you can see patterns in their sensory processing and whether they seek out or avoid sensory input. For some children this happens more broadly where they may consistently be sensory seekers- the risk takers, feet, hands and elbows in the sensory bin, throwing sand up in the sandbox, shoes and socks off to really feel all the feels! This sensory seeker loves to swing high and fast- “higher!” is a common refrain from the swing set! The sensory avoider might prefer to play on the edge of the sandbox, move away when play areas get too crowded with other children, prefer the play structure to the swings, watch rather than hop on the tire swing, leave their shoes and socks on at the beach. Being one way or the other is not necessarily problematic. When does it become something that warrants more attention?

 
IMG_2533.jpg
 

When a child seeks out and craves sensory input and their body never feels quite “satiated,” some interventions might be needed. This child may have difficulty focusing, taking turns, or attending to teachers in the classroom. This child may always be moving such that it interferes with their ability to learn and socialize with peers. They may be too close to peers, accidentally bumping into them, cannot maintain their place in a line, or has difficulty sitting at carpet time in the classroom or library. You might ask, how does this differ from ADHD? Most often, children with ADHD would have a similar response to stimuli as a child who craves sensory input. The child with ADHD can habituate to the stimulus and respond with cognitive strategies, whereas a child who cannot properly modulate sensory input and is constantly seeking it out, cannot habituate and responds when given sensory strategies.

Occupational therapists can be especially helpful to observe the child and make recommendations on what sensory input can help the child regulate their responses. This involves looking at the task, environment, social emotional context, and what type of sensory input the child is craving.

 
IMG_3790.jpg
 

For the sensory avoider, this child may look like they are mellow, rule followers who sit and attend without attracting much attention to themselves. In reality, these children may be overwhelmed by their environment and struggling to attend because they are focusing on all of the sensory input around them. They may notice the buzz of the fluorescent lights in the classroom, the hum of the air conditioner, the sniffling of the person next to them. You might see the sensory avoidant child withdrawing from groups and standing on the periphery, covering their ears when sounds reach a very high pitch, asking to use the bathroom or get a drink of water frequently. These children are constantly trying to tame the sensory input in our sensory-rich world. They may have strong reactions to slight touch, be extra-sensitive to clothing, temperatures, and textures. Intervention can be helpful, just as it can for the sensory-seeker but to give the child strategies to tolerate sensory input. OTs can help the child’s nervous system habituate to sensory input so that it does not affect their ability to attend or socialize with peers.

Think about your own sensory preferences? Do you crave or avoid sensory input? Has this changed over the course of your life? Observe your child and notice how they seek out or avoid sensory input.

 
IMG_3378.jpg
 

References

James, K., Miller, L.J., Schaaf, R.C., Nielsen, D.M., Schoen, S.A. (2011) Phenotypes within sensory modulation dysfunction. Comprehensive Psychiatry. 52, 715-724. Doi:10.1016/i.comppsych.2010.11.010.

Ochesenbein, Mim. (2018). Is It Sensory Processing Disorder or ADHD? Retrieved from https://www.spdstar.org/node/1114

Tummy Time!

tummy+time+with+trucks.jpg

I’m sure you have heard that Tummy Time is important for your baby.

What you may not know is how much Tummy Time you should do, what that exactly means, or why it is important. Tummy Time helps babies strengthen their back, neck, shoulder and eye muscles to reach developmental milestones such as sitting, crawling, eating, and visual tracking. It also helps children later in life to function in school settings because all of those skills relate back to their developmental milestones. Tummy Time also prevents plagiocephaly or flat head syndrome.

You may notice that your infant has automatic movements that OTs refer to as reflexes. We all have reflexes and they begin in utero and help newborns travel through the birth canal and immediately feed by suckling and eventually sucking.

Reflexes also help the infant move against gravity and pair their vision to movement, to name a few purposes our reflexes serve. As babies grow, these reflexes become integrated to allow for more complex movements. Tummy Time helps with this because babies are feeling the force of gravity and how their movements can develop when placed in this position.

IMG_1427.JPG

So how much Tummy Time should you do?

0-3 months:

The American Academy of Pediatrics recommends up to 1 hour of Tummy Time per day up to 3 months old. This is done over the course of the day and can be done in small increments.

Here are a few ideas:

lay your infant on your lap to burp them, carry them in a football hold, lay down facing your infant so they can see you and hear you while you talk to them, place them on the tummy after each diaper change for a quick minute. You should notice that your infant can lift their head somewhat while on their tummy.

By 3 months of age you can bolster your infant during Tummy Time by placing a rolled up towel under their chest with their chin and arms over it. Always supervise your baby during Tummy Time and especially when using a bolster. Side lying is another position that can be used with your 3 month old. Use a rolled up towel to support  the baby’s back and be sure the arms are out in front to encourage reaching.

Side lying tummy time- use a rolled up towel behind the baby.

Side lying tummy time- use a rolled up towel behind the baby.

4-6 months:

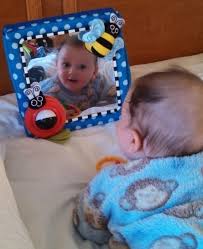
This is a good time to use a mirror during Tummy Time! By now your infant will be able to push up onto their forearms and lift their head 90 degrees. You can use black and white picture cards or prop a board book up for them to look at. At 5 months they will begin to push up on their hands and straighten the arms and even reach for a toy while on their tummy. By 6 months they may be moving in a circle while on their tummy or rolling over on each side. Around 5-6 months your child may start sitting up, bringing their hands and toes to midline, and holding objects in midline to look at. When held by the hands and pulled to sit by a caregiver, your child’s head should be in line with the body. Tummy Time helps build all of these muscles in the back and neck!

tummy time with mirror.jpeg

7-9 months:

By now your child may be pushing up to all 4s in Tummy Time, rocking back and forth, and starts crawling. Oftentimes, commando crawl happens first, with the baby moving forward on forearms. Look for symmetry when crawling. If your child is scooting, moving one leg out more than the other or fails to move the hands and knees in a bilateral manner, consult with your pediatrician.

IMG_8747.jpg

10-12 months:

By now your child may be on the move! They may cruise using furniture to move around in standing, walk with two hands held and then one hand. It is still important however to play games with your child on all 4s in a crawling position! There is immense sensory feedback happening when your child is touching different textures and moving their limbs symmetrically. A play tunnel is a great way to keep crawling and building these skills even if it is mastered and they are on to walking!

Keep kiddos crawling even beyond 1 year of age!

Keep kiddos crawling even beyond 1 year of age!


Remember to consult with your pediatrician if you have any concerns about your child. Avoid Tummy Time after eating. Keep it fun and a time for connection with your baby!

IMG_2400.jpg

Picky Eaters

 
IMG_7110.JPG
 

There are many reasons why toddlers are picky eaters. I won’t go into each cause but I will give you some strategies to try if you do happen to have a picky eater. Please note that I am not going into detail if your child has a Pediatric Feeding Disorder. Please consult with your physician. My hope is that with these tips you will gain some strategies to help your kiddo if they are a selective eater.

This reminds me of the book series “If You Give a Mouse a Cookie.” Chances are, if you have a toddler, you have a picky eater. In many ways it is developmentally appropriate. They are asserting their independence to choose to eat the foods that they like. And you have probably discovered that you can’t force a child to eat. As the saying goes, “You can lead a horse to water but you can’t make them drink….”

 
IMG_4025.jpg
 

Here are some simple tips you can try to help your child expand their food repertoire…

  1. Offer choices.

    Veggies are usually the main culprit amongst picky eaters. You can see on the picture above with the 4 plates from kiddos ages 2-4 that veggies are left. You can offer a choice between 2 vegetables. Do you want carrots or peas? It’s not a fruit OR a veggie but a veggie that they have the power to choose within the limits you are providing. You can also see that the quinoa mixture wasn’t eaten. You can also give children the choice to mix their foods by deconstructing it- a sandwich: give them the bread and the nut butter to spread themselves, salad: lettuce with the toppings on the side, quinoa or rice mixture: add nuts or beans or cheese on the side for them to add. You get the idea…

  2. Exposure.

    You may have heard that it takes repeated exposure for a child to try a new food. There is not a hard and fast guaranteed number, although it is usually around 14 times that a child is presented the food will they actually accept it. By putting the non-preferred food on the plate with the preferred food will allow your child to slowly adjust to it. Whether it is the extreme case of your child not wanting it anywhere near them (successively place it closer with each meal), or they will not touch the food, it is all about baby steps. The goal is for them to have a healthy relationship with food and see new and novel foods as something exciting. It is not to make eating something scary. You can also present foods with different dips to try. Show them how to eat it with the various dips. Once your child is comfortable with touching a food, smelling a food, placing it near the lips to “kiss it,” encourage them to taste it with you. Eating is a social activity. You can also use fun toothpicks or tongs to introduce very very small tastes of food! How daunting would it be even as an adult if someone came at you with a huge piece of a new or non-preferred food for you to try?!

  3. Eat with your kids.

    Have you gone to dinner with friends only for everyone to say, “I’m just having a drink.” It is no fun to eat alone. Eat with your kids! If they are eating dinner early, you may not want to eat a full dinner but grab some carrots and hummus and model eating. Especially non-preferred foods. While you eat you can talk about the sensory aspects of the food. How it feels in your mouth. The sound of the crunch. If you don’t like the way it feels in your mouth… Talk about how we as adults try new foods and how scary it can be even for us!

  4. Serve an appropriate amount of food.

    Your tot probably does not need as much food as you are serving. A big plate of food can feel overwhelming to them so start small and serve seconds if they finish their first appropriate size serving. Just put a few pieces on their plate and you will be amazed what happens!

    Here is a link to a great resource for serving size by age

    https://www.childrens.com/health-wellness/recommended-serving-size-by-age

    In a nutshell, think of a deck of cards for protein, a yo-yo for grains and veggies.

  5. Cook and serve foods a different way.

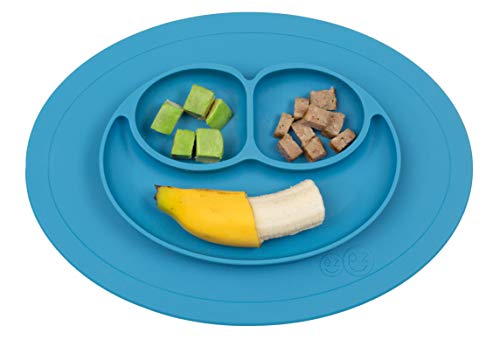
    Show your child how the way a food is cooked can change the texture. Steam carrots, roast carrots, puree, grate, cut in a circle, use a mandolin. There are so many ways to change up how you are preparing and serving foods. This appeals to kiddos who are sensitive to textures as well. If your child doesn’t like mushy try serving applesauce with a graham cracker stick to dip. If they have a hard time taking a bite out of something try cutting apples into thin matchsticks. You can serve foods in ice cube trays or muffin tins to make the serving size small and let them eat in any order they choose!

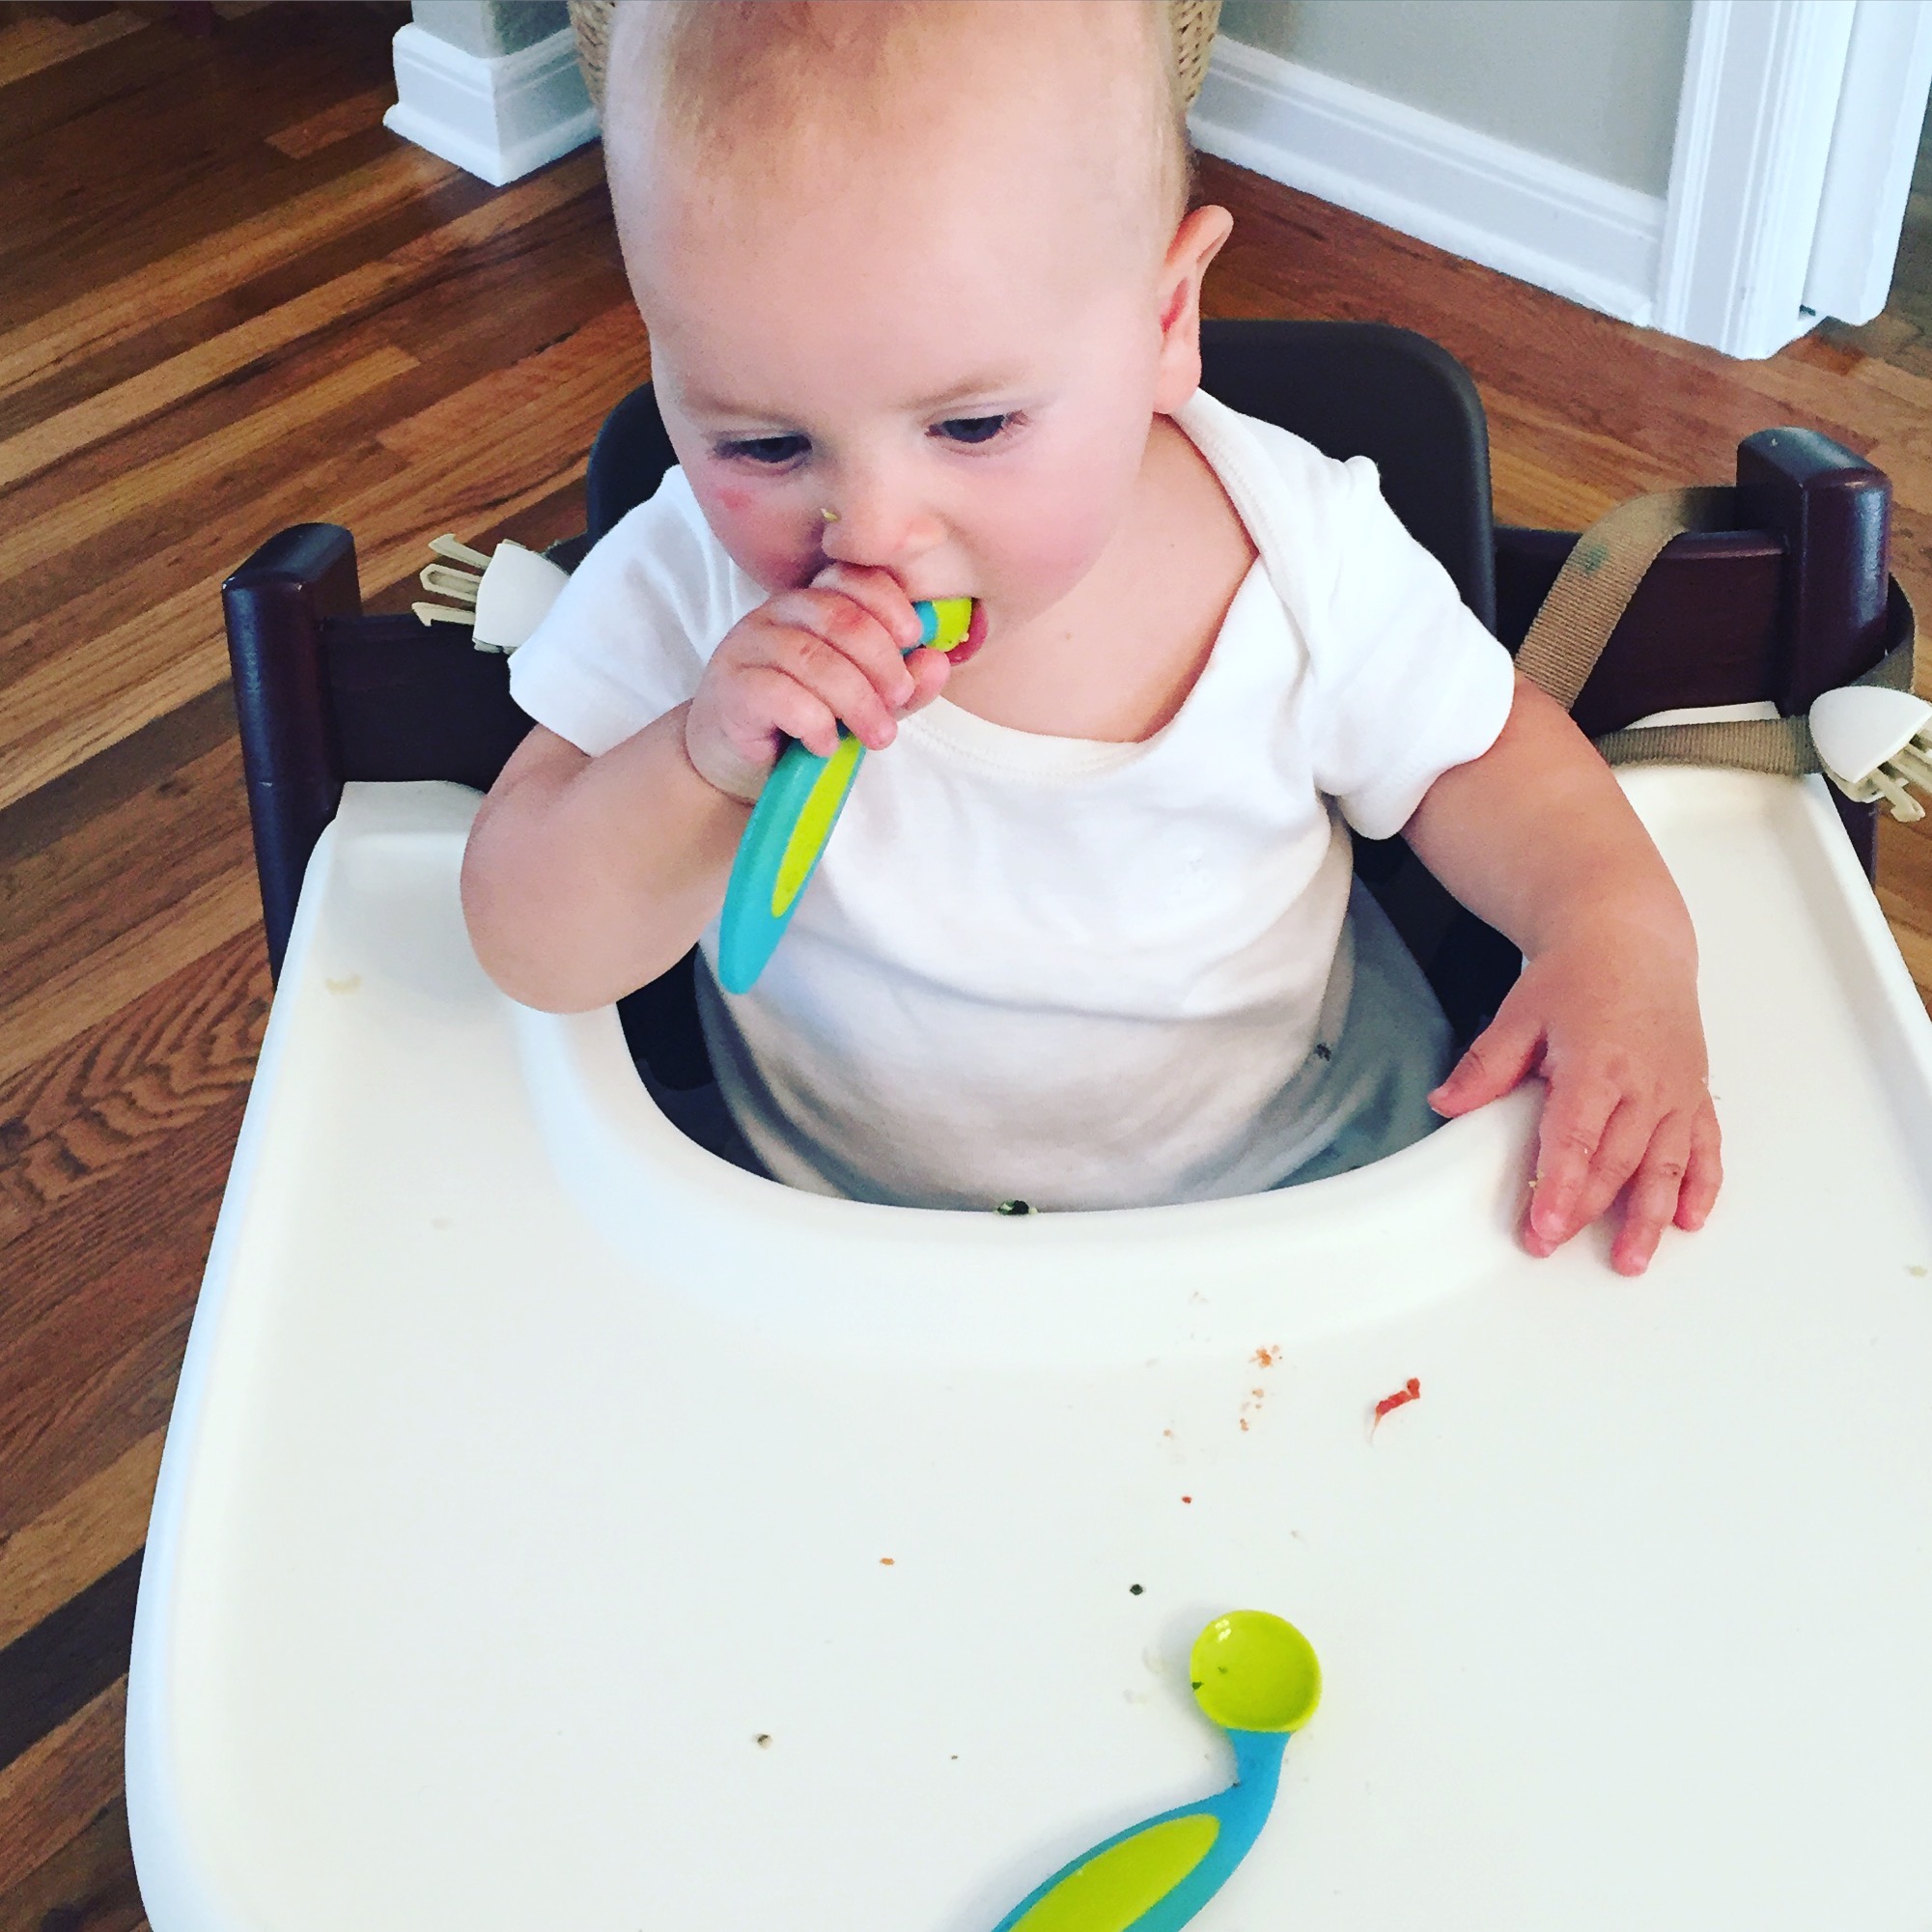
    You can also give your small child a spoon to hold when you are feeding them so they feel that they are part of the meal and it helps teach self-feeding. Sure it may be messier but this gets them excited and willing to eat when they have control over it!

 
IMG_2887.jpg
 

6. Re-think Snacks.

This tip stuck with me from the book, It’s Not About the Broccoli. When you are serving a snack, bring a non-preferred food. A bag of carrots always goes over well when my kids are getting hangry and calling out “mom I’m SO hungry! Can I have a snack?” This works best when we are out and about and the options are limited. If all I have to offer is carrots and a fruit, chances are both will get eaten. The same thing happens at home right before dinner. It is inevitable. You are cooking dinner and the kids come into the kitchen “mom I’m starving!” I always offer carrots or cucumbers and they know that is the only option. Usually they will still ask for something else and my answer is that they can have it after dinner. Sometimes by the end of dinner they have completely forgotten about it!

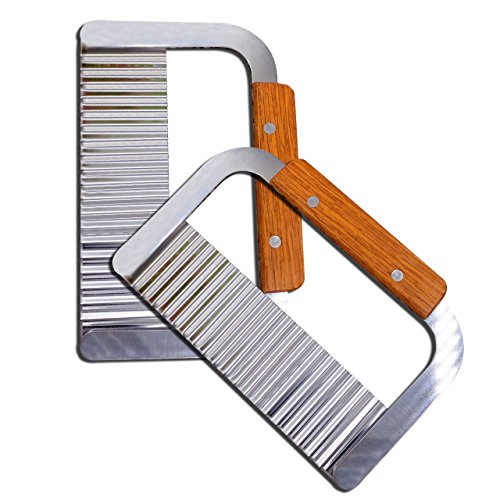
Here is the fun tool I use to cut veggies!

7. Dessert

Try placing a small “dessert” on the plate with dinner. This will help children see that dessert can be part of the meal, not this grand finale or a necessary end to a meal. Dessert does not need to be ice cream, cookies, or chocolate. It can be fruit or cheese, dried fruit, or yogurt. Soon your child may even save it for last but realize that all things in moderation have their place. What if your child only eats the sweet thing on their plate? This is the perfect opportunity to talk about what food does for us. How it fuels us and helps our body work at it’s best. This is also an opportunity to lay some ground rules for your family meals- wait until everyone is done eating (or mostly done), ask to be excused, eat around your plate trying each item, clear your plate when you are finished.

Most importantly, remember to teach your child that eating is fun. Talk about how food works to give us nutrients. Here is a great book to show this:

I hope that these tips help with your selective eater. Remember that if your child has a more serious Pediatric Feeding Disorder or refuses to eat food with any nutritional value, please talk to your pediatrician. I am happy to answer questions that you have so please leave a comment and share with other parents of toddlers!